Setting Up the Web Server
In this chapter, we will finally be able to set up the web server on the ESP32. And for this, we are going to use the excellent ESPAsyncWebServer library developed by Hristo Gochkov. Adding this library to our project is child’s play with PlatformIO. To use the latest stable version, just edit the platformio.ini file and add the lib_deps directive to the last line:
[env:esp32doit-devkit-v1]
platform      = espressif32
board         = esp32doit-devkit-v1
framework     = arduino
upload_speed  = 921600
monitor_speed = 115200
lib_deps      = ESP Async WebServer
That’s all you have to do! PlatformIO will take care of downloading the source code of the library and integrating it into your project on its own. So you can directly include the library in the main.cpp file:
#include <Arduino.h>
#include <SPIFFS.h>
#include <WiFi.h>
#include <ESPAsyncWebServer.h>
It’s that simple!
Preparing the web server
Now we need to set the listening port of the web server. By default, HTTP servers listen on port 80:
// ----------------------------------------------------------------------------
// Definition of macros
// ----------------------------------------------------------------------------

#define LED_PIN   26
#define BTN_PIN   22
#define HTTP_PORT 80
We can then create the server:
// ----------------------------------------------------------------------------
// Definition of global variables
// ----------------------------------------------------------------------------

Led    onboard_led = { LED_BUILTIN, false };
Led    led         = { LED_PIN, false };
Button button      = { BTN_PIN, HIGH, 0, 0 };

AsyncWebServer server(HTTP_PORT);
Let’s now define the server initialization function.
Configuring the web server
The simplest and most concise way to do this would be to declare the following routine:
void initWebServer() {
    server.serveStatic("/", SPIFFS, "/");
    server.begin();
}
Indeed, all the files of the web user interface that are located in the data directory of our project are in fact located at the root / of the SPIFFS. Therefore the above directive allows the HTTP / path to be associated with the root of SPIFFS and any static resources associated with this path to be served by the corresponding file located at the root of SPIFFS. For example, the /index.html path is automatically associated with the index.html file located at the root of SPIFFS:
http://esp32_ip_address/index.html
But if you enter the following URL in your browser:
http://esp32_ip_address/
In this case you are referring to the HTTP root path /, which cannot be associated with any particular file located at the root of the SPIFFS. You should therefore specify what should be the default SPIFFS file to send to the browser if the URL only designates the HTTP root path:
void initWebServer() {
    server.serveStatic("/", SPIFFS, "/").setDefaultFile("index.html");
    server.begin();
}
This procedure is perfect for serving files hosted on SPIFFS as is. But remember that the index.html file must be slightly modified just before being sent to the browser.
Template processing
As a reminder, the index.html file contains a %STATE% template directive that must be resolved by the web server before being sent to the client browser:
<!DOCTYPE html>
<html>

<head>
  <meta charset="utf-8">
  <meta name="viewport" content="width=device-width, initial-scale=1.0">
  <meta name="apple-mobile-web-app-capable" content="yes">
  <meta name="author" content="Stéphane Calderoni">
  <meta name="description" content="ESP32 Remote Control with WebSocket">
  <title>ESP32 remote control</title>
  <link rel="icon" type="image/x-icon" href="favicon.ico">
  <link rel="stylesheet" href="index.css">
  <script src="index.js"></script>
</head>

<body>
  <div class="panel">
    <h1>ESP32 remote control</h1>
    <div id="led" class="%STATE%"></div>
    <button id="toggle">Toggle</button>
  </div>
</body>

</html>
The %STATE% directive must indeed be replaced by the CSS class which corresponds to the current state of the LED:
<div id="led" class="%STATE%"></div>
If the LED is turned on, the CSS class on must be specified. Otherwise, the CSS class off is specified, although it is not necessary to specify a particular CSS class in this case since it is the default appearance of the HTML element that represents the LED. To perform this substitution, we will define a template processor:
String processor(const String &var) {
    return String(var == "STATE" && led.on ? "on" : "off");
}
And here is how to associate this processor to the specific case of the HTTP root path / using the predefined methods of the ESPAsyncWebServer library:
void onRootRequest(AsyncWebServerRequest *request) {
  request->send(SPIFFS, "/index.html", "text/html", false, processor);
}

void initWebServer() {
    server.on("/", onRootRequest);
    server.serveStatic("/", SPIFFS, "/");
    server.begin();
}
All we have to do now is to activate the initialization of the web server in the setup() function:
// ----------------------------------------------------------------------------
// Initialization
// ----------------------------------------------------------------------------

void setup() {
    pinMode(onboard_led.pin, OUTPUT);
    pinMode(led.pin,         OUTPUT);
    pinMode(button.pin,      INPUT);

    Serial.begin(115200); delay(500);

    initSPIFFS();
    initWiFi();
    initWebServer();
}
This time we’re in! To convince you of this, compile and upload the code to the ESP32 and point your browser to the appropriate URL by entering the IP address obtained by the microcontroller. In my case, the URL is as follows:
http://192.168.1.32/
Then press the button to change the status of the LED and reload the page on the browser. You should see that the web user interface now reflects the current status of the LED on each reload:
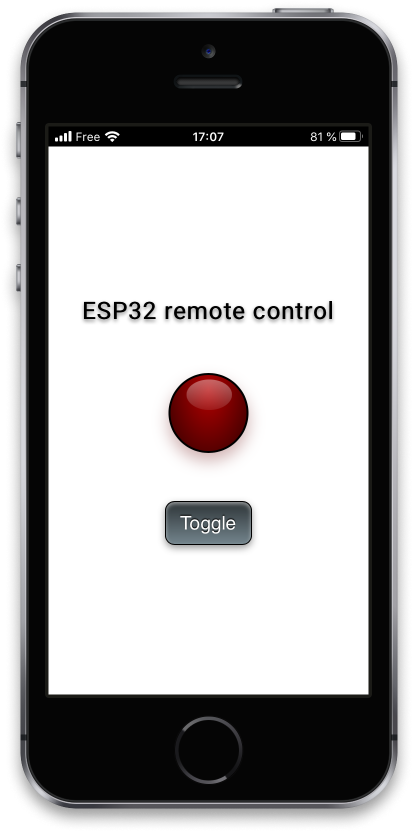
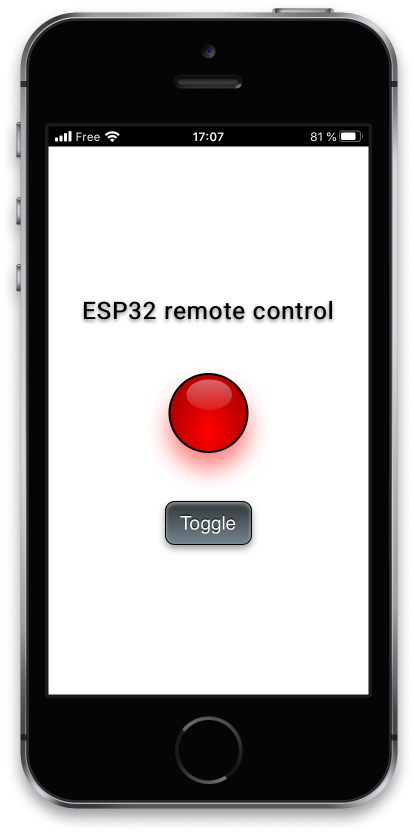

For the moment, we have to reload the page to see the current status of the LED. When you press the button, the web user interface is not updated automatically. This is precisely what we will do using WebSocket.
In the meantime, you can now update the baseline project by going to the remote-control-with-websocket directory and executing the following git command:
git checkout v0.6
You can also download the updated main.cpp file and replace yours in your own project:
Here is the complete code for this chapter:
/**
 * ----------------------------------------------------------------------------
 * ESP32 Remote Control with WebSocket
 * ----------------------------------------------------------------------------
 * © 2020 Stéphane Calderoni
 * ----------------------------------------------------------------------------
 */

#include <Arduino.h>
#include <SPIFFS.h>
#include <WiFi.h>
#include <ESPAsyncWebServer.h>

// ----------------------------------------------------------------------------
// Definition of macros
// ----------------------------------------------------------------------------

#define LED_PIN   26
#define BTN_PIN   22
#define HTTP_PORT 80

// ----------------------------------------------------------------------------
// Definition of global constants
// ----------------------------------------------------------------------------

// Button debouncing
const uint8_t DEBOUNCE_DELAY = 10; // in milliseconds

// WiFi credentials
const char *WIFI_SSID = "YOUR_WIFI_SSID";
const char *WIFI_PASS = "YOUR_WIFI_PASSWORD";

// ----------------------------------------------------------------------------
// Definition of the LED component
// ----------------------------------------------------------------------------

struct Led {
    // state variables
    uint8_t pin;
    bool    on;

    // methods
    void update() {
        digitalWrite(pin, on ? HIGH : LOW);
    }
};

// ----------------------------------------------------------------------------
// Definition of the Button component
// ----------------------------------------------------------------------------

struct Button {
    // state variables
    uint8_t  pin;
    bool     lastReading;
    uint32_t lastDebounceTime;
    uint16_t state;

    // methods determining the logical state of the button
    bool pressed()                { return state == 1; }
    bool released()               { return state == 0xffff; }
    bool held(uint16_t count = 0) { return state > 1 + count && state < 0xffff; }

    // method for reading the physical state of the button
    void read() {
        // reads the voltage on the pin connected to the button
        bool reading = digitalRead(pin);

        // if the logic level has changed since the last reading,
        // we reset the timer which counts down the necessary time
        // beyond which we can consider that the bouncing effect
        // has passed.
        if (reading != lastReading) {
            lastDebounceTime = millis();
        }

        // from the moment we're out of the bouncing phase
        // the actual status of the button can be determined
        if (millis() - lastDebounceTime > DEBOUNCE_DELAY) {
            // don't forget that the read pin is pulled-up
            bool pressed = reading == LOW;
            if (pressed) {
                     if (state  < 0xfffe) state++;
                else if (state == 0xfffe) state = 2;
            } else if (state) {
                state = state == 0xffff ? 0 : 0xffff;
            }
        }

        // finally, each new reading is saved
        lastReading = reading;
    }
};

// ----------------------------------------------------------------------------
// Definition of global variables
// ----------------------------------------------------------------------------

Led    onboard_led = { LED_BUILTIN, false };
Led    led         = { LED_PIN, false };
Button button      = { BTN_PIN, HIGH, 0, 0 };

AsyncWebServer server(HTTP_PORT);

// ----------------------------------------------------------------------------
// SPIFFS initialization
// ----------------------------------------------------------------------------

void initSPIFFS() {
  if (!SPIFFS.begin()) {
    Serial.println("Cannot mount SPIFFS volume...");
    while (1) {
        onboard_led.on = millis() % 200 < 50;
        onboard_led.update();
    }
  }
}

// ----------------------------------------------------------------------------
// Connecting to the WiFi network
// ----------------------------------------------------------------------------

void initWiFi() {
  WiFi.mode(WIFI_STA);
  WiFi.begin(WIFI_SSID, WIFI_PASS);
  Serial.printf("Trying to connect [%s] ", WiFi.macAddress().c_str());
  while (WiFi.status() != WL_CONNECTED) {
      Serial.print(".");
      delay(500);
  }
  Serial.printf(" %s\n", WiFi.localIP().toString().c_str());
}

// ----------------------------------------------------------------------------
// Web server initialization
// ----------------------------------------------------------------------------

String processor(const String &var) {
    return String(var == "STATE" && led.on ? "on" : "off");
}

void onRootRequest(AsyncWebServerRequest *request) {
  request->send(SPIFFS, "/index.html", "text/html", false, processor);
}

void initWebServer() {
    server.on("/", onRootRequest);
    server.serveStatic("/", SPIFFS, "/");
    server.begin();
}

// ----------------------------------------------------------------------------
// Initialization
// ----------------------------------------------------------------------------

void setup() {
    pinMode(onboard_led.pin, OUTPUT);
    pinMode(led.pin,         OUTPUT);
    pinMode(button.pin,      INPUT);

    Serial.begin(115200); delay(500);

    initSPIFFS();
    initWiFi();
    initWebServer();
}

// ----------------------------------------------------------------------------
// Main control loop
// ----------------------------------------------------------------------------

void loop() {
    button.read();

    if (button.pressed()) led.on = !led.on;

    onboard_led.on = millis() % 1000 < 50;

    led.update();
    onboard_led.update();
}