ESP32
Light Sleep
Deep Sleep
Hibernation
Experimenting with ESP32 sleep modes
Thursday, March 19, 2020
How To Interact With ESP32 Using The Push Buttons
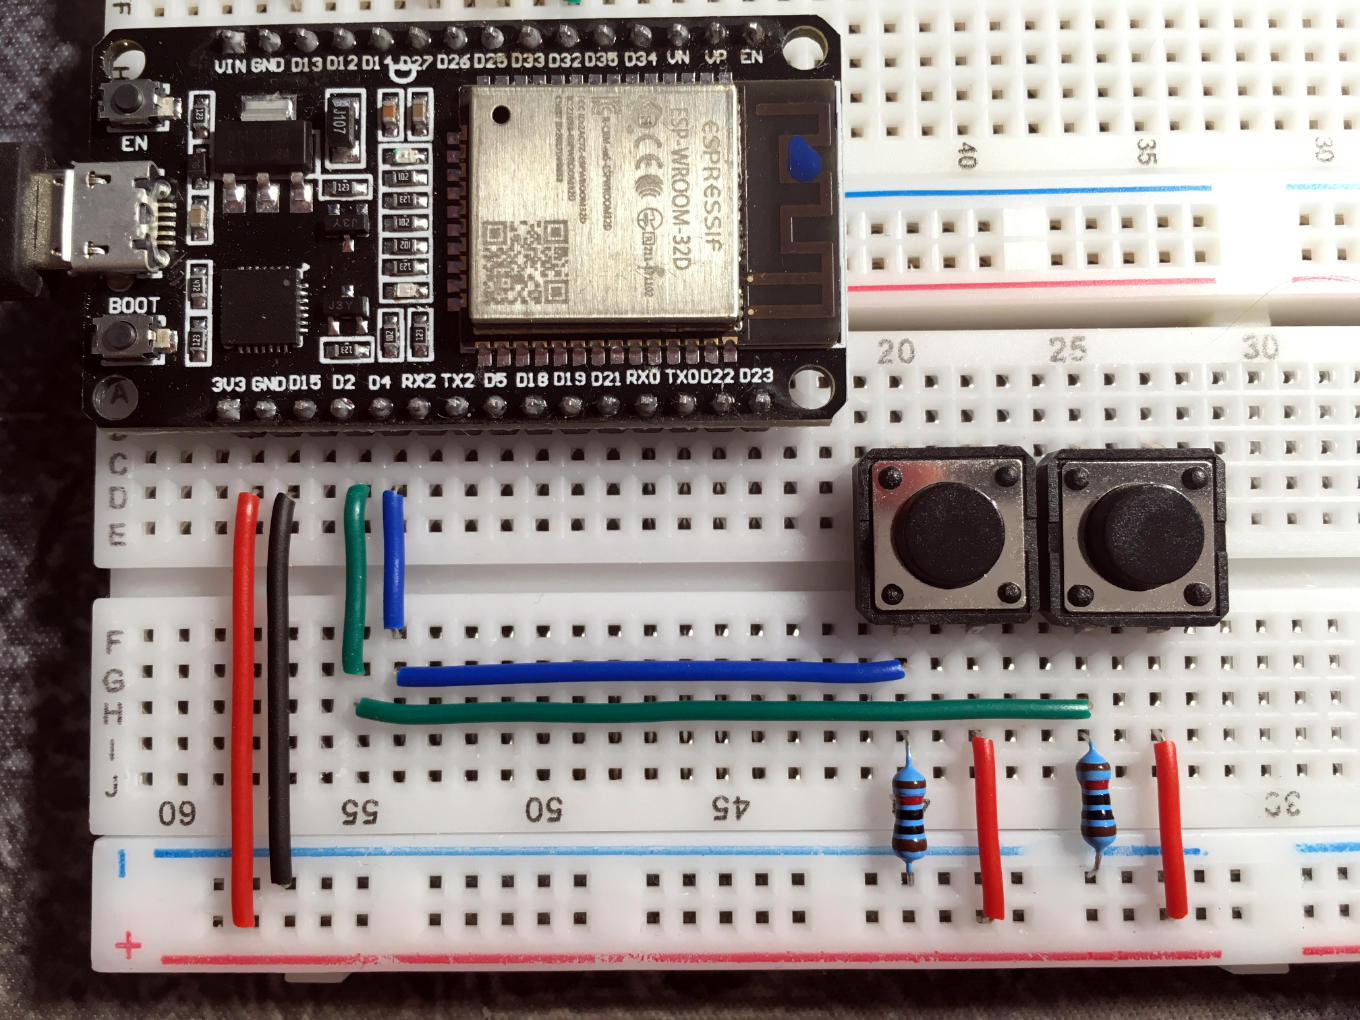
We have 2 push buttons available on the circuit to interact with the microcontroller. The left button will be used to control the LED ramp, while the right button will be used to put the microcontroller to sleep.
Setting Up
To handle these buttons easily, we will declare a specific Button data type:
// ----------------------------------------------------------------------------
// Definition of button properties
// ----------------------------------------------------------------------------

struct Button {
    gpio_num_t pin;
    uint8_t    state;
};

Button shiftButton = { GPIO_NUM_4, 0 }; // left button
Button sleepButton = { GPIO_NUM_2, 0 }; // right button
pindefines the input pin to which the button is connected.stateis an 8-bit integer that defines the state of the button as follows:

An 8-bit integer is used to encode values between 0 and 255 (between 0x00 and 0xff).
This simple modeling makes it possible to distinguish two instantaneous pressed and released states, as well as a durable held state whose value tells us the number of cycles during which the button has been held down.
Note here that at a frequency of 25 Hz, if the button is held down for 10 seconds, the state variable will reach a value close to the limit of values that can be encoded on 8 bits. So if you need to detect a longer period of time, you should choose to encode the state variable on 16 bits instead.
Well, now we have to think about configuring the read pins of the buttons in the setup() function:
// ----------------------------------------------------------------------------
// Initialization
// ----------------------------------------------------------------------------

void setup() {
    // configure the button pins
    pinMode(shiftButton.pin, INPUT);
    pinMode(sleepButton.pin, INPUT);

    // configures the LED pins
    for (uint8_t i=0; i<LED_NUMBER; i++) {
        pinMode(LED_PINS[i], OUTPUT);
    }

    // turns on the active LED
    digitalWrite(LED_PINS[ledIndex], HIGH);

    // initializes the timer
    timer = { millis(), 0 };
}
Now that everything is in place to handle the buttons, let’s take a closer look at how to do it.
Implementing An Event Manager
Just after defining the updateLED() function, add the following piece of code:
// ----------------------------------------------------------------------------
// Button status handling
// ----------------------------------------------------------------------------

void readButton(Button *b) {
    bool pressed = digitalRead(b->pin) == HIGH;

    if (pressed) {
             if (b->state < 0xfe) b->state++;
        else if (b->state == 0xfe) b->state = 2;
    } else if (b->state) {
        b->state = b->state == 0xff ? 0 : 0xff;
    }
}

bool pressed(Button *b) {
    return b->state == 1;
}

bool released(Button *b) {
    return b->state == 0xff;
}

bool held(Button *b) {
    return b->state > 1 && b->state < 0xff;
}
You’ll notice that these 3 new functions wait for a parameter which is a pointer to a Button (designated by the * operator). In other words, when calling these functions, the Button instances will have to be passed by reference. Indeed, by default, the arguments of a function are passed by value, i.e. by making a copy of these objects. So within the function’s body, any modification made on these copies will have no impact on the original objects. By passing arguments by reference, the function has access (through the pointer) to the original object. So any changes made to this object will be retained after the function has finished executing.
Using The Event Manager
Now let’s see how to use these new features. Let’s take the case, for example, where we want to scan the LED ramp as long as we keep the shiftButton pressed:
// ----------------------------------------------------------------------------
// Main control loop
// ----------------------------------------------------------------------------

void loop() {
    // read the shiftButton status
    readButton(&shiftButton);

    if (held(&shiftButton) && timer.ticks % 3 == 0) {
        ++ledIndex %= LED_NUMBER;
        updateLED();
    }

    waitForNextCycle();
}
We could have just written:
if (held(&shiftButton))
But at 25 Hz, the scan would have been too fast, so to slow it down, we apply it only once every 3 cycles:
if (held(&shiftButton) && timer.ticks % 3 == 0)
Note here, however, that the scrolling speed is directly correlated to the execution frequency defined by the LOOP_FREQUENCY constant. As we saw in the previous chapter, if we want to keep the LEDs lighting up time independent of this frequency, we would have to write things differently. But I refer you to the previous chapter to reread this detail.
You also notice that shiftButton is indeed passed by reference, using the & operator.
You can now compile and upload the program to ESP32. And you should get this:
We could also make it so that we only go to the next LED each time the button is pressed. This is by the way what we’ll keep as behavior for the rest of the tutorial. Here is how to proceed:
// ----------------------------------------------------------------------------
// Main control loop
// ----------------------------------------------------------------------------

void loop() {
    readButton(&shiftButton);

    if (pressed(&shiftButton)) {
        ++ledIndex %= LED_NUMBER;
        updateLED();
    }

    waitForNextCycle();
}
This time we get the following result:
We’ll use the realeased() function in the next chapter, when it comes time to act on the second button.
The Resulting Code
To conclude this chapter, here is the complete code of this experiment:
// ----------------------------------------------------------------------------
// Definition of LED properties
// ----------------------------------------------------------------------------
//                                  RED        YELLOW        GREEN
//                                   0            1            2
const gpio_num_t LED_PINS[] = { GPIO_NUM_27, GPIO_NUM_25, GPIO_NUM_32 };
const uint8_t    LED_NUMBER = 3;

// defines the index of the active LED
uint8_t ledIndex = 0;

// ----------------------------------------------------------------------------
// Definition of time control parameters
// ----------------------------------------------------------------------------

const uint16_t LOOP_FREQUENCY = 25;                    // Hz
const uint16_t WAIT_PERIOD    = 1000 / LOOP_FREQUENCY; // ms

struct Timer {
    uint32_t laptime;
    uint32_t ticks;
};

Timer timer;

// ----------------------------------------------------------------------------
// Definition of button properties
// ----------------------------------------------------------------------------

struct Button {
    gpio_num_t pin;
    uint8_t    state;
};

Button shiftButton = { GPIO_NUM_4, 0 };
Button sleepButton = { GPIO_NUM_2, 0 };

// ----------------------------------------------------------------------------
// Initialization
// ----------------------------------------------------------------------------

void setup() {
    // configure the button pins
    pinMode(shiftButton.pin, INPUT);
    pinMode(sleepButton.pin, INPUT);

    // configures the LED pins
    for (uint8_t i=0; i<LED_NUMBER; i++) {
        pinMode(LED_PINS[i], OUTPUT);
    }

    // turns on the active LED
    digitalWrite(LED_PINS[ledIndex], HIGH);

    // initializes the timer
    timer = { millis(), 0 };
}

// ----------------------------------------------------------------------------
// Active LED lighting
// ----------------------------------------------------------------------------

void updateLED() {
    for (uint8_t i=0; i<LED_NUMBER; i++) {
        digitalWrite(LED_PINS[i], i == ledIndex ? HIGH : LOW);
    }
}

// ----------------------------------------------------------------------------
// Button status handling
// ----------------------------------------------------------------------------

void readButton(Button *b) {
    bool pressed = digitalRead(b->pin) == HIGH;

    if (pressed) {
             if (b->state < 0xfe) b->state++;
        else if (b->state == 0xfe) b->state = 2;
    } else if (b->state) {
        b->state = b->state == 0xff ? 0 : 0xff;
    }
}

bool pressed(Button *b) {
    return b->state == 1;
}

bool released(Button *b) {
    return b->state == 0xff;
}

bool held(Button *b) {
    return b->state > 1 && b->state < 0xff;
}

// ----------------------------------------------------------------------------
// Time control of the main loop
// ----------------------------------------------------------------------------

void waitForNextCycle() {
    uint32_t now;
    do { now = millis(); } while (now - timer.laptime < WAIT_PERIOD);
    timer.laptime = now;
    timer.ticks++;
}

// ----------------------------------------------------------------------------
// Main control loop
// ----------------------------------------------------------------------------

void loop() {
    readButton(&shiftButton);

    if (pressed(&shiftButton)) {
        ++ledIndex %= LED_NUMBER;
        updateLED();
    }

    waitForNextCycle();
}